
The Samus Aran DIY Project: Varia Suit Helmet

Yep, this is it- The completed Samus helmet!
I cannot even begin to tell you what a task creating this costume has been. Just getting the design correct, without a pattern and only by looking at character stills, has been difficult enough. But then there’s the added pressure to create the entire project in under $75…Which means recycling and reusing materials around the house. I would not recommend this project if you don’t have about a month of free evenings, the determination of an ox, and the patience to continue working despite some failures.
I have one week. One week left to finish the costume, and I’m mentally smacking myself for taking my time up to this point. I had the helmet and arm cannon done two weeks ago, and have little to show for progress up til this past Monday. I feel like I just went back to college and it’s finals week- staying up until wee hours of the morning, waking up to make a disheveled appearance at work, then returning home to more work and late nights. Mr. Frog thinks I’m crazy, and I’ll admit my sleep deprivation causes me occasional fits of mad-scientist hysterical laughter. I even talk to Samus like she’s a real robot… but I couldn’t be more pleased with the results so far. In my blog, I’m going to show step-by step instructions on how to make this Samus Aran costume DIY style. But first, a little quip about Samus, and why every girl should want to be her for Halloween instead of another version of Sexy-Vinyl-Cop.
Samus Aran is an female bounty hunter originally introduced in the 8-bit video game Metroid by Nintendo (on NES). She fights aliens, Space Pirates, and her arch-nemesis Mother Brain, who happens to be a giant jellyfish. The game was released in the mid 80’s as a cross breed of Super Mario and Legend of Zelda style game play, with influences of the movie ‘Alien’ and underground “metro” design. It only made sense that the main character, Samus Aran, was an android…or a human in a droid suit. It wasn’t until the end of the original Metroid game that Samus is revealed as a female. The ultimate Tomato Surprise! (Look this term up, I promise you will try to use it in a sentence today!)
In a predominately male-centered role in the gaming world, the female Samus became an instant icon. The reveal was empowering to women. Women didn’t have to be characterized by tight leather spandex suits or scantily clad with a husky come-get-me-boys voice to kick some major butt. Instead, Samus is quiet, covered in thick, high-tech body armor, and she is still considered one of the “hottest babes” in the gaming world. That’s why I’d pick Samus over a Naughty School Girl costume every time.
Materials:
1 baseball batting helmet (got mine at Salvation Army for $5)
1 1/2 ft plastic electrical tubing ($0.89 per foot at your hardware store)
1 empty 2 liter pop bottle (a green one, so Sprite or Mountain Dew)
Liquid Nails glue (you will use about 1 tube for the entire costume)
1 12” x 18” sheet EVA foam (you might as well get several sheets as this is the primary material for your costume)
2 small plastic toy balls (got mine from Dollar Store toy section $0.50/ each, about the size of your palm and make sure they are the hollow inflatables)
1 roll masking tape (pretty much all you need for the entire costume)
1 bottle red and 1 bottle black acrylic paint ($1 each from craft store- just get the cheap stuff)
1 bottle Elmer’s Glue (Get 2 because you need them for the whole costume)
Xacto knife
Scizzors
Jigsaw
Instructions:
(scroll down to the bottom for the pictorial step-by-step!)
Step 1: Use jigsaw to cut brim off helmet. Sand edges smooth. Cut out some of the foam inside so it fits comfortably (optional)


Step 2: Draw and cut out foam facial pieces. I glued together 2 layers for added strength and dimension. If you want to do any etchings, use a roller ball pen and press down hard, but don’t puncture the foam. Make sure it will fit onto the helmet.


Step 3: Turn on your stove (or oven) and heat up the foam just until it goes limp and flimsy. This lets you mold it into shapes. Mold the facial part to fit the helmet and with enough space to take the helmet on and off. Try molding it around a bowl or the back of the helmet to achieve this shape.
Step 4: Seal the foam. Use a mixture of 1:1 Elmer’s glue and water. Paint onto foam- both front and back. Allow to dry completely. This turns the foam into a paintable medium.

Step 5: Puncture both plastic/rubber balls and deflate. Cut off excess material or fold under until you get the desired shape and size. Glue to helmet, and use masking tape to help keep it on. (Note: I used the masking tape to create an elongated look off the back of the balls. You can paint over it and it looks just fine.)


Step 6: Use red acrylic paint or mix red and black to achieve desired color and paint your helmet, rubber balls, and (once dried) foam. I used a sponge brush to reduce the appearance of brush strokes. Make sure you paint the backside of the foam too! You may need a few coats to adequately cover the logos and such. Once dried, go ahead and paint in all those little etchings you made on the mouth piece. I waited until it was attached to the helmet and it wasn’t easier.

Step 7: Attach foam to helmet using liquid nails glue. You want some strength in this bond, so use the heavy duty stuff and follow the directions on the package. I can’t tell you how many times I picked up the entire helmet by the front apparatus, so you will be thankful you took this piece of advice. (Also, make sure you leave plenty of room for your head J, and keep in mind you will be attaching a visor, so the foam piece can’t stick out too far from the front of the helmet.)

Step 8: Attach the visor. This has its own step by step… 1) Remove the label from the 2 liter bottle (use a hot water soak for the stubborn stuff). 2) Cut off top and bottom so you have a nice rectangle. 3) Measure how it will fit your helmet and cut to size. 4) This is the tricky part- making something round, well, less round. Tape the cut out to the inside of the helmet. It will try to curl up on you but once you get it fitted correctly you can adjust it as needed.

Step 9: Give your helmet some sweet dmg! (That’s geek-speak for damage). Use black paint, splatter, etc. to get the appearance you just ganked some noobs. (Or, beat up on less advanced players and characters) Mine got ‘naded.
Step 10: Make your breathing tube. Hey, Samus is a human in alien environments after all, she’s got to breathe! Take your electrical tubing and paint it gray, being sure to get into all those little crannies. Or if you got the gray tube, good- for- freaking- you. I got the blue… Twist to the shape of the helmet and glue to the sides with more liquid nails.
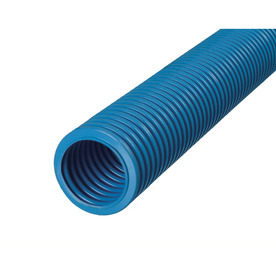
What I got
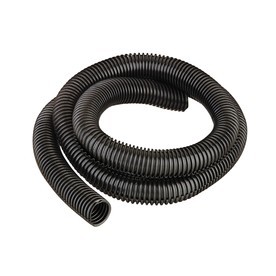
What I should have gotten
That’s it! Mine turned out great! Here it is:

If you have any questions please send me a message. I hope yours turned out great and the directions were easy to follow! Check out the next entry in
The Samus Aran DIY Project: The Arm Cannon!
No comments:
Post a Comment