Ever notice how all the robotic, android, and machinist suits have giant rib cage armor? Well turns out, our human weakness is evident in our lack of natural shielding of our hearts. One spear to the torso and we are goners. So to remedy this apparent inadequacy, we humans have invented breastplates and vest armor. Samus has especially large rib cage armor. Here is how you make Samus’ vest.
Materials:
(You should already have most of these by now!)
- Collared shirt
- Permanent marker and pencil
- Masking tape
- Large roll of Craft foam (you will want a little more length than the 12 x 18” we have been using up to now)
- Elmer’s Glue
- Scissors
- Stove/ oven
- Paintbrush (I used my foam brush for the entire project)
- 1 bottle Gold and a little bit of black paint
- Water
- Disposable plastic bowl or cup (for glue/water mixture)
- Old newspaper or other drop cloth for protecting surfaces
That’s it! Let’s do this!
Instructions:
Step 1: Make a pattern.
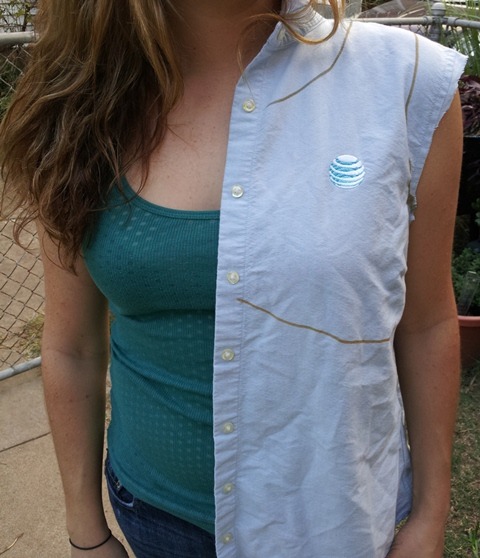
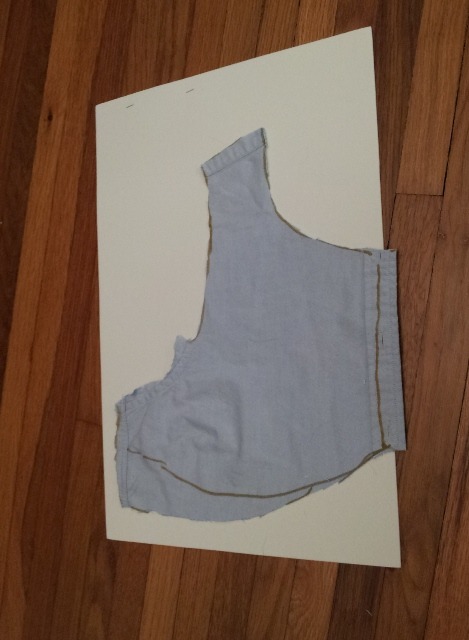
Grab an old collared shirt that fits nicely. You are going to cut it up, so make sure you won’t want to wear it again. Chop off the sleeves and draw a vest pattern that will fit you comfortably and fall low enough to accentuate your natural curves. (*Hint: the lowermost point should fall very near the bottom of your actual rib cage or just above.) Cut out the two front vest pieces to the shoulder and underarm seams.
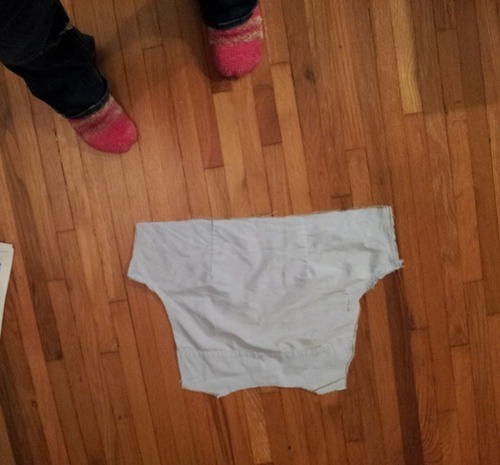
Step 2: Freehand the back piece.
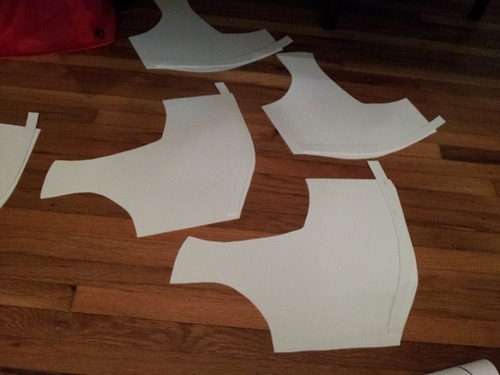
I have very limited knowledge of how to make sewing patterns, but this is my best go at it: Lay out the back piece on a flat surface and replace the cut-out front pieces so they match up with their original seams. Line up the edges and mark where the pieces meet at the shoulder and under the arm. This will be the guideline for drawing the back of the vest. Now remove the front pieces and draw on the back. Hold the back pattern up and check in the mirror to see if it is situated nicely, and it is OK to redraw it a couple times until you get it right. Once you have a pattern you like, cut it out:
You should now have 3 pieces cut out for your vest.
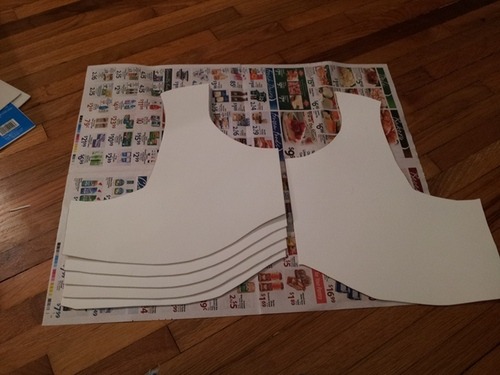
Step 3: Foam time.
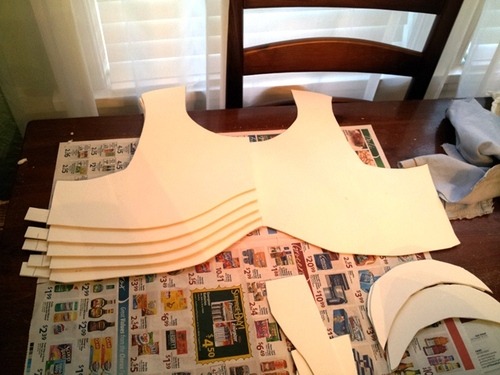
Lay out each piece on your craft foam, gently trace with a pencil, and cut them out. To make multiple layers, take the piece of foam you just cut, trace it onto another piece of foam, but move the bottom line up about ¾ inch or 1 inch and cut this piece out. Save the scrap ¾ inch slivers of foam from each piece; you will use them! Continue to do this for each of the three pieces, for as many layers as desired- I made five:
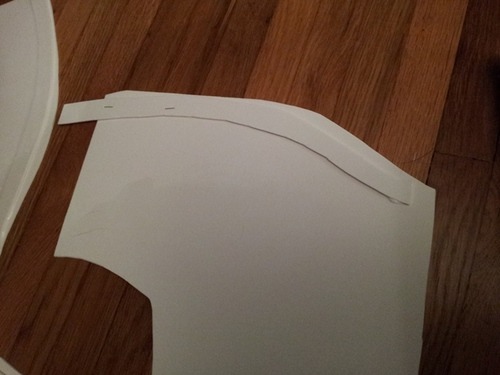
Step 4: Bulk up.
Your foam vest may look a little flat, so to bulk it out and give dimension, glue those ¾ inch slivers to the backs of each layer- about ½ inch from the bottom. I let the ends of mine stick out so I could seamlessly attach the front pieces to the back, and I recommend doing so. Also, I didn’t want to have bulk toward the top and underarms because there will be a chest and jet pack piece over the top. Plus I didn’t want my underarms to get sore! (If you have ever used crutches, you’ll know what I mean.)
Spread out each piece to dry thoroughly.
When the glue is dry, stack the pieces and see if the piece is bulky enough. If not, simply glue more slivers on top of the ones you just made and let dry completely.
Step 5: Glue all the layers together.
You may find this is easier said than done. You will need to glue each layer to the one below, while keeping your edges perfectly aligned. I didn’t allow for drying time between each layer, but I’m not sure it made any difference. If you are having trouble, try using masking tape to keep the edges all lined up. In fact, you may just want to do this anyway for a more seamless transition between pieces. Don’t get frustrated if this takes some time, just take a break and come back after Game of Thrones is over.
Step 6: Connecting the pieces.
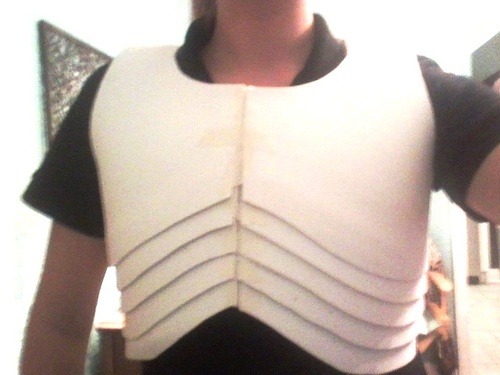
You should be seeing things come together- GET EXCITED! You are almost done! Turn on your stove or oven and, using the method in my helmet tutorial, mold each piece to curve around your body. You might want to grab a friend (one with thumbs preferably) to help you with the back piece. Take extra time to curl around the shoulders and underarm pieces. If you are larger chested ladies, try to curl the bottom of the chest piece slightly so it doesn’t poke straight out. The thicker pieces will be more difficult to keep their curl, but don’t bother too much with it because we will go back to the stove once they are all connected. Once cooled, take your masking tape and attach each of the shoulders front to back. You will have another piece over this connection, so don’t worry about how pretty it is- we just want it to stay! Do the same to the underarms, gluing the tabs from the slivers behind the back piece for extra stability. If your layers are pretty obvious around the front of the arm holes, simply place a strip of masking tape along the entire seam. The tape will be painted over anyway, so as long as there are no stray or bubbled pieces it will look fine. Take off the vest, heat it up again, and mold it to fit your body, once again focusing on the shoulders and underarms. Leave the center seam open if you do not want to pull it on over your head (I had to have Mr. Frog help me take it off and put it on), otherwise tape up the center seam too. Here is what it looked like on me at this point:
(*Hint- If you do not tape the center seam, I would recommend using a heavy duty Velcro or snaps to keep it together. You will want to cut out another piece of foam, attach it permanently (via tape) to one side (inside) and place the Velcro/snaps on the other side of the chest and line the partner up on the edge of the foam strip. Hopefully this makes sense.)
Step 7: Seal and Paint
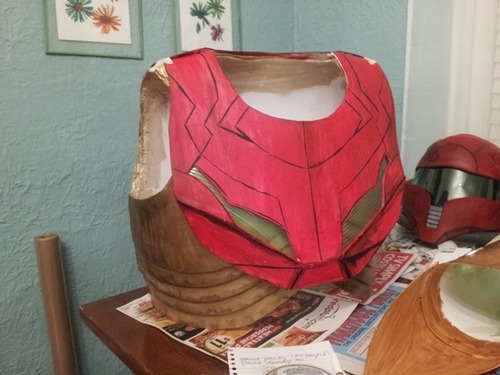
Using 1:1 glue and water seal the foam by painting the entire surface and let dry completely. You can then paint the vest gold. Add some damage with the black paint once the gold is dry. I painted gold around the visible inside edges in the underarm, shoulder, and black paint between layers for a little more completeness and dimension. I don’t have a picture of the finished vest by itself, but here it is completed with the chest and back pieces which will be the next tutorial!
Hope you enjoyed this and it wasn’t too difficult. Stay tuned to see the tutorial on these awesome LIGHT-UP chests and back pieces!


+shopped.jpg)